Content modeling with Sanity schemas
Learn how to create custom schemas for a blog with Sanity.
By Chris Jardine
January 25, 2023

In this tutorial, you'll learn how to create various schemas that serve as the data models for a blog. This will be very basic, using Sanity's built-in 'block' type without any customizations. If you're looking for information on creating custom content blocks, such as for embedding YouTube videos or code blocks, you can find that here: [LINK TO ARTICLE].
Initialize the project
If you're following along in the series, you should already have a project. If not, the starter project can be found here. If you have your own existing Sanity project, you shouldn't have any issues following this tutorial either.
Clone the starter project if you need to:
git clone https://github.com/c-jardine/typescript-next-sanity-v3.git blog
cd blog
npm i
Set up the project structure
We'll be keeping our schemas in the src/studio directory.
Schemas are built with a combination of 'documents' and 'objects'. Documents are used for the main elements, such as posts, authors, tags, etc. Objects can be used inside of documents as a way to reuse fields, provide additional configurations, and more.
To start, we'll create a documents directory inside the studio directory. In that, create a file called author.ts. That will, of course, be the schema for authors.
Build the author schema
You can use whatever fields you'd like your author schema to have. I'm just going to start with a name, avatar, and bio.
We'll define our schema with the defineType function provided by the sanity package. This function takes in an object with our schema definition:
author.tsimport { defineType } from 'sanity';
const author = defineType({
// Your schema definition here
});
export default author;ts
At a minimum, our schema must have a name, type, and fields array. Since we're creating a document, the type property will be 'document'. Click here to learn more about the document type.
The name property must be unique, as this is what the property name will be in the API response. We'll just use 'author'.
I'm also going to add the property title and give it the value 'Authors'. This will be shown as the title of the document type in the Studio. Without it, the title will be generated automatically from the name property.
The fields array will contain all of the fields (crazy, I know) we want to provide data for in the Studio.
Create author fields
For a list of available field types, click here.
Inside the fields array, we can create objects for the data we want our authors to have. Each object requires name and type properties.
For the first object, we'll create name field of type string. Note: Sanity has a string type and a text type. Use string for shorter fields as it will generate a single-line text input. The text type will generate a textarea input, so it's better suited for shorter values.
Follow the same process for the 'bio' field, using the text type.
Avatar and the Image type
Read more about the image type here.
The avatar field will use the type image. This type comes with additional options. We want to be able to crop our images, so we'll add the hotspot: true option.
Wrapping up the author schema
With all of our fields populated, here is what it should look like now:
author.tsimport { defineType } from 'sanity';
const author = defineType({
title: 'Author',
name: 'author',
type: 'document',
fields: [
{
title: 'Name',
name: 'name',
type: 'string',
},
{
title: 'Bio',
name: 'bio',
type: 'text',
},
{
title: 'Avatar',
name: 'avatar',
type: 'image',
options: {
hotspot: true,
},
},
],
});
export default author;ts
If you run your app and go to your Studio, you should now see an Authors field that lets you create new authors.
Now, we're missing a couple important things. We want to be able to access our authors on our website in a readable way, such as at http://localhost:3000/authors/chris-jardine. To do this, Sanity includes a special slug type, which we can use to generate a url-encoded string from any field we'd like (or you can enter it manually). I like to generate it from the name field. To make sure someone can't create an author without a name, we'll add validation to that field.
Adding field validation
Read more about validation here.
Say we want to require an author's name field to not be empty and between 4 and 28 characters. We can implement that like so:
author.ts// ...
{
title: 'Name',
name: 'name',
type: 'string',
validation: Rule => Rule.required().min(4).max(24)
},
// ...ts
Adding the slug field
Read more about the slug field here.
We'll need to add a new field of type slug. This object will also use source: 'name' as an option. This means the slug will be generated from the 'name' field. Personally, I like to add it as the first object in the fields array, but feel free to organize your fields any way you'd like.
author.ts// ...
{
title: 'Slug',
name: 'slug',
type: 'slug',
options: {
source: 'name',
},
},
// ...ts
Build the post schema
Create a new document file called post.ts. We'll keep this simple for the sake of this tutorial. I want to add a slug, title, author, and content body. The slug and title should be easy:
post.tsconst post = defineType({
name: 'post',
title: 'Post',
type: 'document',
fields: [
{
title: 'Slug',
name: 'slug',
type: 'slug',
options: {
source: 'title',
},
},
{
title: 'Title',
name: 'title',
type: 'string',
validation: (Rule) => Rule.required(),
},
],
});
export default post;ts
Create a relation to the author schema
We want to use authors that exists in our database, so this part is a little different. To do this, we'll use the type reference, which requires another property named to, which will tell Sanity what type to use for the relation. In our case, we want to say the field has a reference to author. We do that like so:
post.ts// ...
{
name: 'author',
title: 'Author',
type: 'reference',
to: [{ type: 'author' }],
validation: (Rule) => Rule.required(),
},
// ...ts
Dealing with rich text and block content
Sanity's built-in editor rich text and block content editor is great for writing blogs. That's what I'm using to write this blog. It utilizes portable text, which makes it super easy to present our blog on the front end however we want.
It's also highly customizable. The default editor supports standard HTML headings, blockquotes, bold, italic, underline, strikethrough, code, ordered and unordered lists, and links. However, you can build custom types for the editor. For example, this blog's code blocks with syntax highlighting and tab groups are custom types I created. It's pretty straightforward to do, as the presentation you see is completely decoupled from the schema itself.
Anyway, to use the built-in editor, your field will use the type array, which requires an additional of property whose value is an array of types. We just want to use the type block.
Note: The of field is where you'll add custom content types.
So, that field will look like this:
post.ts// ...
{
name: 'content',
title: 'Content',
type: 'array',
of: [{ type: 'block' }],
validation: (Rule) => Rule.required(),
},
// ...ts
Final schemas
You should have ended up with the following in your schema files:
author.tsimport { defineType } from 'sanity';
const author = defineType({
title: 'Author',
name: 'author',
type: 'document',
fields: [
{
title: 'Slug',
name: 'slug',
type: 'slug',
options: {
source: 'name',
},
},
{
title: 'Name',
name: 'name',
type: 'string',
validation: (Rule) => Rule.required().min(4).max(28),
},
{
title: 'Bio',
name: 'bio',
type: 'text',
},
{
title: 'Avatar',
name: 'avatar',
type: 'image',
options: {
hotspot: true,
},
},
],
});
export default author;ts
post.tsimport { defineType } from 'sanity';
const post = defineType({
name: 'post',
title: 'Post',
type: 'document',
fields: [
{
name: 'slug',
title: 'Slug',
type: 'slug',
validation: (Rule) => Rule.required(),
options: {
source: 'title',
},
},
{
name: 'title',
title: 'Title',
type: 'string',
validation: (Rule) => Rule.required(),
},
{
name: 'author',
title: 'Author',
type: 'reference',
to: [{ type: 'author' }],
validation: (Rule) => Rule.required(),
options: {
disableNew: true,
},
},
{
name: 'content',
title: 'Content',
type: 'array',
of: [{ type: 'block' }],
validation: (Rule) => Rule.required(),
},
],
});
export default post;ts
Configure Sanity to use new schemas
Before we can use our schemas, we need to add them to the schemaTypes array in the src/studio/schemas/index.ts file.
I like to create separate arrays for documents and objects to help clean up the code a little bit. I also use barrel files a lot, so your imports may look a little different. Here's what my file looks like:
studio/schemas/index.tsimport { author, post } from './documents';
const documents = [author, post];
export const schemaTypes = [...documents];ts
This file should already be imported in your sanity.config.ts file, so you won't have to do anything else. But if you're having issues, it should look like this:
sanity.config.tsimport { defineConfig } from 'sanity';
import { schemaTypes } from './schemas';
const config = defineConfig({
// ...other config settings
schema: {
types: schemaTypes,
},
});
export default config;ts
Create your blog content
At this point, you can start up your server if it isn't already running and check out your Sanity Studio. You should see something resembling the following:
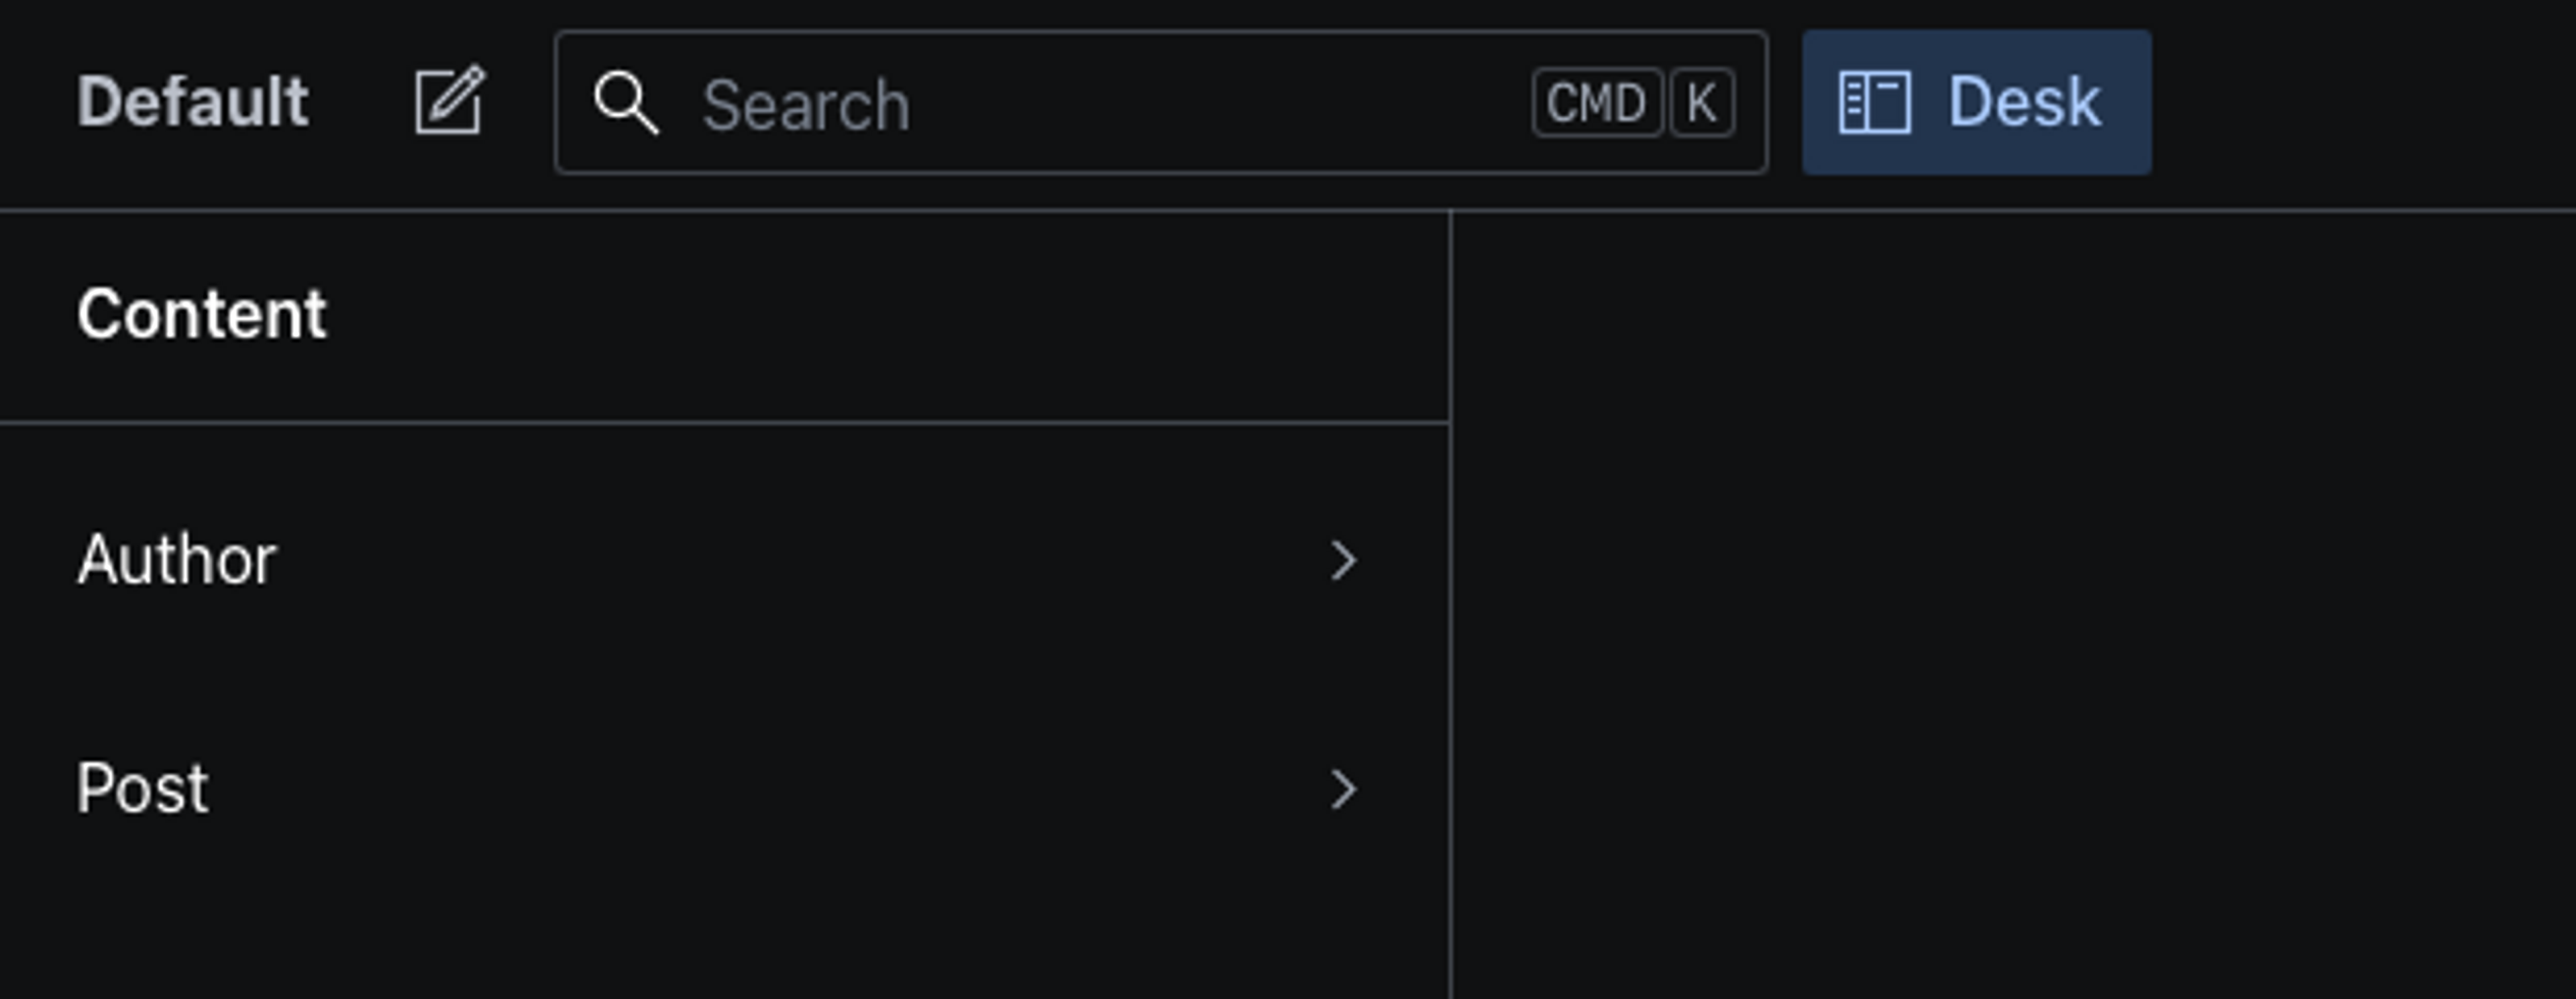
Sanity Studio showing the Author and Post data models.
You can now create your authors and blog posts!
Summary
In this tutorial, we covered how to create basic schemas for modeling your data with Sanity. We also covered relations and block content. The process for creating schemas for anything follows this same process, so you should pretty much be able to model anything you want.